Output logs in Console, File and Live stream for your WebSharper sitelet
Output logs in Console, File and Live stream for your WebSharper sitelet
Logs are an important part of development.
Extracting and analysing debug output and errors is very important especially when the web server goes live.
In this post I will show how we can setup a Console target, a File target and a Live stream on a static HTML page using NLog.
NLog is a log framework which can be configured to output logs on different “target”.
https://github.com/nlog/NLog/wiki/Targets
This post is composed by 4 parts:
1. Get NLog on your sitelet
2. Define a Console target
3. Define a File target
4. Define a Live stream target - WebSharper part
1. Get NLog on your sitelet
First start by getting NLog and NLog.Configuration packages from nuget. This will install NLog package in your project and also add an xml configuration nlog.xml file with an xsd.
To start logging, simply get the logger instance via
let logger = LogManager.GetCurrentClassLogger()
and start logging by using any of the log level Trace/Debug/Info/Warning/Error/Fatal.
logger.Trace "Some log message"
The logger is threadsafe so getting it from anywhere should not be a problem.
That’s all we need to do from the code to log messages. Now we need to define targets to write to. Starting from the most common one - write to the Console.
I use a simple WebSharper OWIN selfhost created from the selfhost template.
2. Define a Console target
Targets are the main writers of NLog.
In order to get logs written, two configurations are needed:
- At target
- A rule directing logs to a target
To setup a console target we add the following in the nlog.xml config:
<targets>
  <target xsi:type="Console"
          name="console"
          layout="[${longdate}] ${level}: ${message}"/>
</targets>
The type is the target type here Console. The name will be used to make rules point to that particular target and the layout is used to format the log message and enhance it with other values like timestamp.
Next we need the rule to define which logs will be printed in console. We add the following in the config file:
<rules>
    <logger name="*" minlevel="Trace" writeTo="console" />
</rules>
And that’s it. The config should look like that:
<?xml version="1.0" encoding="utf-8" ?>
<nlog xmlns="http://www.nlog-project.org/schemas/NLog.xsd"
      xmlns:xsi="http://www.w3.org/2001/XMLSchema-instance"
      xsi:schemaLocation="http://www.nlog-project.org/schemas/NLog.xsd NLog.xsd"
      autoReload="true"
      throwExceptions="true"
      internalLogLevel="Off"
      internalLogFile="temp\nlog-internal.log">

  <targets>
  <target xsi:type="Console"
          name="console"
          layout="[${longdate}] ${level}: ${message}"/>
  </targets>

  <rules>
    <logger name="*" minlevel="Trace" writeTo="console" />
  </rules>
</nlog>
Now when running the WebSharper selfhost, we should see the log output in the console.

3. Define a File target
We can also define a file target to get log outputs saved into a file.
<target xsi:type="File"
        name="file"
        layout="[${longdate}] ${level}: ${message}"
        fileName="logfiles\${date:universalTime=true:format=yyyy-MM-dd}.logs"
        createDirs= "true" />
There are much more attributes that NLog handles for file logs.
Here are the few I set:
layoutis similar to layout onConsole target.fileNameis the log filename. Using the date as name will create adaily logfile which will help in finding logs faster.createDirscreates the sub directories of the log files.
We also need to add the rule similar to (2).
<logger name="*" minlevel="Trace" writeTo="file" />
Now when running the Websharper selfhost, we should see the logs output in the file.

4. Define a Live stream (SSE)
We are almost done as we can now visualize the log in direct from the Console and we have it stored in daily Files.
But what about the times where we don’t have access to a console?
There are times where we don’t have a console, for example if our application is a Windows service.
We could check the log files but that is not good enough, we need a quick way to see a log stream to detect potential errors.
A solution is to provide a HTTP endpoint which will deliver a log stream.
Having a HTTP endpoint will allow us to:
- not have to remote to the vm to check logs
- have a log output constantly open and easily inspect the log stream
- have a log output even though our application doesn’t have a console
This idea actually came from my friend @nbevans and I thought that I had to cover it because it is the log target that I now use the most.
In order to create the endpoint we will leverage the custom targets from NLog together with HTTP SSE (server-send events).
4.1 Custom target
Our custom target will be named HttpSSELogTarget.
The way it will work is as followed:
- NLog route logs to our custom target
- We append the log in a global state where we hold all unread logs
- WebSharper sitelet SSE endpoint hits and we deliver all unread messages
In order to provide a global state of logs we create a MailboxProcessor which we’ll call HttpLogAgent.
If you never seen mailbox before, I covered it in a previous blog post on [How to handle global state in F# with MailboxProcessor](https://kimsereyblog.blogspot.co.uk/2016/07/manage-mutable-state-using-actors-with.html.
Here’s the log agent:
type MessageLog =
| Log of string
| GetUnread of AsyncReplyChannel<string list>

let HttpLogAgent =
    MailboxProcessor.Start(fun inbox ->
        let rec processMessage unread =
            async {
                let! msg = inbox.Receive()
                let newState =
                    match msg with
                    | Log msg -> unread @ [ msg ]
                    | GetUnread reply -> reply.Reply unread; []

                return! processMessage newState
            }
        processMessage [])
The mailbox ensure consistency in concurrent scenarios.
It will be used to post new logs and will hold an internal unread message list.
We then create our custom target.
To create a custom target, we inherit from TargetWithLayout and override Write.
Write will be called each time a log is routed to this target.
type HttpSSELogTarget() =
    inherit TargetWithLayout()
    override self.Write(logEvent: LogEventInfo) =
        let message = self.Layout.Render logEvent
        HttpLogAgent.Post(Log message)

    static member RegisterTarget() =
        ConfigurationItemFactory.Default.Targets.RegisterDefinition("HttpSSELog", typeof<HttpSSELogTarget>)
Now every time a log will be routed, it will be appended in the internal mailbox state.
Next we need to implement the SSE protocol (https://developer.mozilla.org/en-US/docs/Web/API/Server-sent_events/Using_server-sent_events).
4.2 SSE
Client side
If you need to have compatibility, refer to MDN documentation to check if SSE is available for the range of browser versions you need to support.
I don’t need to be concerned about compatibility because the logs will certainly only be used by myself.
From the client, we need to instantiate an EventSource and add a listener on message received.
[<JavaScript>]
type EventSource() =
    [<Inline "new EventSource($source)">]
    new(source: string) = new EventSource()

    [<Inline "$0.addEventListener('message', function(e) { $callback(e.data); }, false)">]
    member self.AddEventListener(callback: string -> unit) = X<unit>
In order to do this, we create a proxy in F# and by using the Inline attribute to bind to the correct JS implementation.
If you never seen the Inline attribute, I covered it in my previous blog post Understand the difference between Inline and Direct in WebSharper.
Next we define a simple page consisting of a div block which will get filled up when messages will be received:
[<JavaScript>]
module Logs =

    let page() =
        let es = new EventSource("logevents")

        divAttr
            [ attr.id "logs"
              on.afterRender(fun el -> es.AddEventListener(fun logMsg -> el.AppendChild((div [ text logMsg ]).Dom) |> ignore)) ]
            []
Note logevents passed to the EventSource is the endpoint name which delivers the event stream. (We will define it next)
Server side sitelet
On the server side we use Content.Custom to create content which will serve an event stream with our logs.
We set the Content-type to text/event-stream, the Cache-control to no-cache and the Connection to keep-alive.
This headers are all important and have to be specified.
Content.Custom(
    Status = Http.Status.Ok,
    Headers =
        [
            Http.Header.Custom "Content-type" "text/event-stream"
            Http.Header.Custom "Cache-control" "no-cache"
            Http.Header.Custom "Connection" "keep-alive"
        ],
    WriteBody =
        (fun stream ->
            let msgs = Logger.HttpLogAgent.PostAndReply(Logger.MessageLog.GetUnread)
            use writer = new StreamWriter(stream)

            for msg in msgs do
                writer.WriteLine("data:" + msg + "\n\n")
        )
    )
The body section extracts all the unread messages from the HttpLogAgent defined in (3.1) and write those in the body with a prefix data: and a suffix \n\n which means end of message.
This is defined in the SSE protocol.
For the SSE to work we will will need 2 endpoints on our sitelet:
- the html page
- the event-stream
type Endpoint =
| [<EndPoint "GET /">] Home
| [<EndPoint "GET /logs">] Logs
| [<EndPoint "GET /logevents">] LogEvents
And here is the full sitelet definition:
type MainTemplate = Templating.Template<"Main.html">

let sitelet =
    Application.MultiPage(fun ctx endpoint ->
        let logger = LogManager.GetCurrentClassLogger()

        match endpoint with
        | Home ->
            logger.Trace "Home"
            Content.Page(MainTemplate.Doc("Home", [ client <@ Home.page() @> ]))

        | Logs ->
            logger.Trace "Logs"
            Content.Page(MainTemplate.Doc( "Logs", [ client <@ Logs.page() @> ]))

        | LogEvents ->
            logger.Trace "Log events"

            Content.Custom(
                Status = Http.Status.Ok,
                Headers =
                    [
                        Http.Header.Custom "Content-type" "text/event-stream"
                        Http.Header.Custom "Cache-control" "no-cache"
                        Http.Header.Custom "Connection" "keep-alive"
                    ],
                WriteBody =
                    (fun stream ->
                        let msgs = Logger.HttpLogAgent.PostAndReply(Logger.MessageLog.GetUnread)
                        use writer = new StreamWriter(stream)

                        for msg in msgs do
                            writer.WriteLine("data:" + msg + "\n\n")
                    )
                )
    )
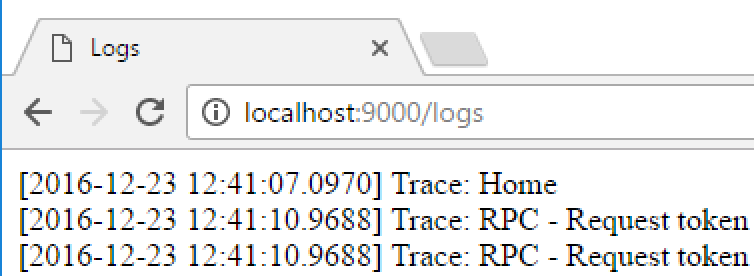
And that’s it! Now if we boot the sitelet and navigate to /logs, we should have a live stream of logs.
Conclusion
Today we saw how we could output logs in Console, Files and in a live stream for WebSharper application using NLog targets and custom targets.
Hope you enjoyed this post as much as I enjoyed writing it.
If you have any questions, leave it here or hit me on Twitter @Kimserey_Lam.
Merry Christmas and see you next time!
Full code available on my GitHub - https://github.com/Kimserey/JwtWebSharperSitelet/blob/master/Website/NLog.config
Other post you will like
- Bring i18n to your WebSharper webapp - https://kimsereyblog.blogspot.co.uk/2016/08/bring-internationalization-i18n-to-your.html
- Create HTML components in WebSharper - https://kimsereyblog.blogspot.co.uk/2016/08/create-html-componants-for-your.html
- Setup a nice output folder for your WebSharper Owin selfhost project - https://kimsereyblog.blogspot.co.uk/2016/07/how-to-setup-nice-output-folder-for.html

Comments
Post a Comment