GIMP Alpha Channel, what is it?
GIMP - Alpha channel, what is it?
Few months ago I made a first introduction to GIMP - https://kimsereyblog.blogspot.co.uk/2016/09/gimps-primary-features.html - the post was oriented toward the toolbox and what features were available.
Today I would like to share an explanation on what the alpha channel is and show you how you can outline text using the alpha channel.
1. What is the alpha channel
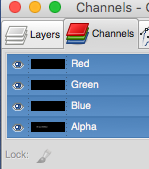
The channels tab can be seen from the Layers view.
There are 4 channels, Red, Green, Blue and Alpha.

The alpha channel is used for transparency.
Transparency means that when you export to .png, the transparent parts of your image will show whatever is underneath. This is very useful for apps icons or images for web design.
When your layer does not have an alpha channel, its name should be bolded.

When it has one it should not be bolded.

Also when right click on the layer, Add alpha channel should be grayed out.

Having an alpha channel allows us to add transparency to our image.
By deleting things on the image, we will be able to see underneath.
Some elements already come with alpha channel, like Text. We will see next how we can use the alhpa channel from Text to outline our text.
2. Add outline to text
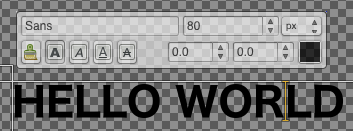
First create some text using the Text tool.

Next click on the text layer and select Alpha to selection.

It means that you will be selecting all colors that aren’t transparent in your current layer - which is just your text.
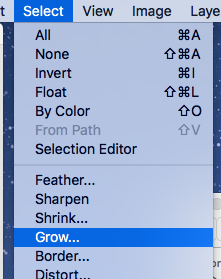
Now go to Selection > Grow and grow the selection by few pixels.

This grows the text selection to the number of pixel requested.

Then create a new layer by clicking on the layer icon from the Layers view and paint the selection.

You can now place the text layer on top of the outline layer and we’re done!

Conclusion
It took me some time to understand what was the alpha channel and what I could do with it.
Today we saw how to add an alpha channel if our image doesn’t have one and we saw how to use the alpha channel of text to outline input.
Hope you like this quick GIMP tutorial! Don’t forget to follow me on Twitter @Kimserey_Lam. See you next time!
Support me
Support me by visting my website. Thank you!
Support me by downloading my app BASKEE. Thank you!

Other posts you will like
- Activity to awaitable task - https://kimsereyblog.blogspot.co.uk/2016/12/transform-operation-from-xamarinandroid.html
- Why I built Baskee? - https://kimsereyblog.blogspot.co.uk/2016/11/why-i-created-baskee.html
- Understand the difference between Internal and External folder storage in Xamarin.Android - https://kimsereyblog.blogspot.co.uk/2016/11/differences-between-internal-and.html
- Use the Snackbar API with Xamarin.Forms - https://kimsereyblog.blogspot.co.uk/2016/11/how-to-use-snackbar-api-in.html
- Build your own Line Chart for Xamarin.Forms (Part 2) - https://kimsereyblog.blogspot.co.uk/2016/10/build-your-own-line-chart-for_31.html
- Build your own Line chart for Xamarin.Forms (Part 1) - https://kimsereyblog.blogspot.co.uk/2016/10/build-your-own-line-chart-for.html

Comments
Post a Comment